Machine Learning
A collection of articles on Machine Learning that teach you the concepts and how they’re implemented in practice.
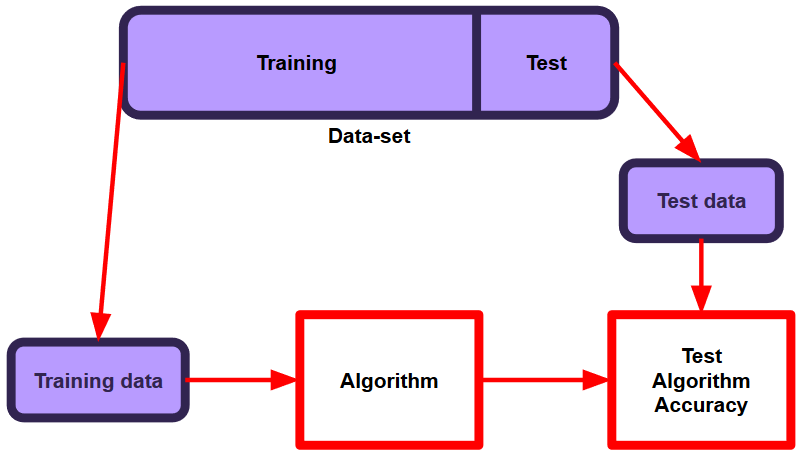
machine learning Data Wrangling and Experiment Implementation
We will use the Keras API on top of TensorFlow to implement our experiment. All code will be in Python, and at the time of publishing everything is guaranteed to work within a Kaggle Notebook.

- Previous
- Experimental Design
- Next
- Results Analysis
From the collection
Machine Learning
A collection of articles on Machine Learning that teach you the concepts and how they’re implemented in practice.